UV printheads, ink paths and capping systems require consistent maintenance. Incomplete cleaning, long idle periods and unstable environments can cause nozzle loss, clogging and downtime. Treat the schedule below as general guidance and follow the machine manual and service recommendations.
This means — the vast majority of headaches can be avoided with regular maintenance.
Read through the checklist below (5 minutes), then print it out and post it next to your machine.
Daily Maintenance (5 Minutes)
The first thing you do at startup, and the last thing before shutdown.
Before Powering On
- Check ink levels — verify remaining ink in each color bottle is sufficient for the day. Don’t wait until a bottle runs dry before refilling — air bubbles in the ink path are a major headache
- Check the waste ink tank — an overflowing waste tank can leak inside the machine and potentially damage circuit boards
- Check UV lamp status — verify the UV lamp indicator is normal and the cooling fan is running
- Check white ink circulation — listen for the white ink circulation pump to confirm normal operation
At Startup
- Run a printhead cleaning cycle — use the machine’s built-in Auto Cleaning function (procedures vary by model)
- Print a test pattern — check the nozzle status for each color. How many nozzles are missing? If more than 3-5 are missing, perform a deep cleaning or manual cleaning
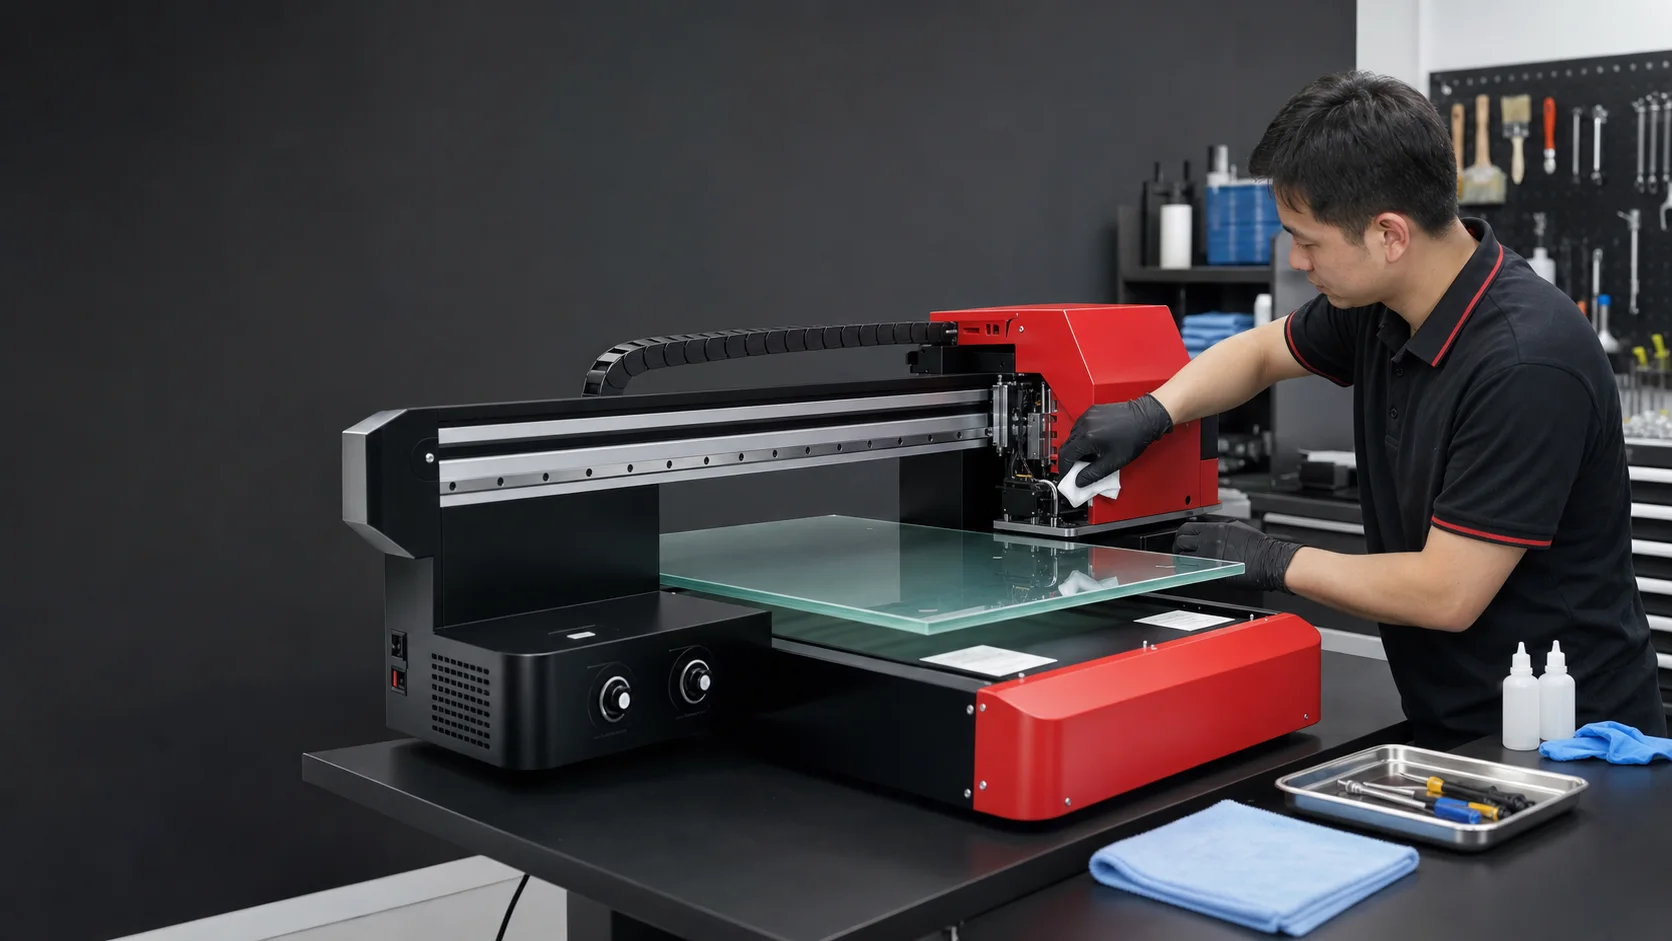
- Check printhead capping — inspect the nozzle surface for dried ink buildup; gently wipe with a lint-free cloth dampened with cleaning fluid
Before Shutdown
- Park the printhead — make sure the printhead returns to the capping station
- Confirm the capping station sponge is moist — if the sponge is dry, the printhead will dry-clog rapidly when exposed to air
- Turn off lamp and air — shut down the UV lamp and air compressor (if equipped)
Weekly Maintenance (20 Minutes)
Set aside a quiet period each week for deeper inspection and cleaning beyond daily routine.
- Clean the encoder strip — use a lint-free cloth dampened with 95% alcohol to gently wipe the encoder strip. This is the single most important and most overlooked maintenance item. A dirty encoder strip causes misalignment, ghosting, and banding — 90% of “sudden print quality drop” complaints are resolved by wiping the encoder strip
- Clean the guide rails — wipe the guide rail surface with a lint-free cloth, then apply a thin layer of lubricating oil. Increased rail resistance can cause stepper motor skipped steps, producing Y-axis banding
- Check the ink path — inspect ink tubes for air bubbles; if present, use the machine’s built-in purge function to expel them
- Clean the vacuum table — dust-clogged vacuum holes reduce material hold-down, causing media shift during printing. Use a vacuum cleaner or compressed air to clear them
- Check all connections — USB cable, power cord, ink tube fittings. Vibration from printhead movement can gradually loosen connectors
Monthly Maintenance (30-40 Minutes)
- Replace ink pump inlet filters — the filter at the ink pump inlet. Don’t wait until it clogs to replace it; periodic replacement costs very little (pennies) but effectively protects the printhead
- Calibrate printhead height — use the machine’s built-in calibration routine to ensure the printhead is parallel to the print bed. Especially important after switching to media of different thicknesses
- Check bed level — use a spirit level to verify the print bed is level. An uneven bed causes inconsistent print accuracy from left to right
- Deep-clean the printhead — if routine cleaning cannot recover all nozzles, use dedicated cleaning fluid with manual or ultrasonic cleaning
- Check UV lamp power — use a UV energy meter to test whether lamp output has degraded. UV lamp energy gradually declines over time, and incomplete curing is a hidden cause of many print quality issues
- Clean the machine interior — use a vacuum cleaner to remove dust and ink splatter inside the machine
- Check belt tension — the timing belt driving the printhead. Too loose creates backlash affecting accuracy; too tight increases motor load
Quarterly Maintenance (1-2 Hours)
- Replace capping station sponges — caps can deform or become contaminated over time, reducing sealing effectiveness
- Inspect ink tubes and fittings — tubes may harden or crack with extended use; fittings may loosen. Replace any that show signs of wear
- Full calibration — perform a complete color calibration and mechanical calibration
- Check electrical connections — open the electrical cabinet and inspect terminal blocks for looseness or oxidation
- Lubricate moving parts — grease all sliding components per the machine manual’s specified lubrication points and grease types
- Check grounding — ensure the machine is properly grounded. Static buildup can interfere with electronics and, in severe cases, damage the main board
How do I fix common breakdowns? Quick reference table
Post this next to your machine — check here first when problems arise.
| Symptom | Most Likely Cause | Solution (try in this order) |
|---|---|---|
| Missing nozzles / banding | Clogged printhead | 1. Auto clean cycle → 2. Manual cleaning → 3. Ultrasonic cleaning |
| Misalignment / ghosting | Dirty encoder strip | 1. Clean encoder strip → 2. Check belt tension → 3. Calibrate |
| Faded or off-color print | Low ink or clogged printhead | 1. Check ink level → 2. Print test pattern → 3. Color calibration |
| Media won’t hold down | Clogged vacuum holes | 1. Clear vacuum holes → 2. Check vacuum fan → 3. Adjust media |
| Y-axis banding | High guide rail resistance | 1. Clean guide rails → 2. Apply lubricant → 3. Check stepper motor |
| Incomplete UV curing | UV lamp power degradation | 1. Inspect lamp → 2. Increase power → 3. Reduce print speed |
| Multi-color misregistration | Encoder strip or belt | 1. Clean encoder strip → 2. Adjust belt tension → 3. Bi-directional calibration |
| Printhead crashes into media | Incorrect height setting | 1. Check printhead height setting → 2. Check bed level |
Maintenance Cost Breakdown
Many worry about maintenance costs. Here is the actual picture:
| Item | Frequency | Annual Cost |
|---|---|---|
| Cleaning fluid | 1 bottle/month | $15-50 |
| Lint-free cloths | 1 roll/month | $8-16 |
| Ink pump filters | Every 3 months | $7-14 |
| Capping station sponges | Every 6 months | $4-8 |
| Lubricating oil | 1 bottle/year | $4-7 |
| UV lamp | Every 2-3 years | $70-200 (per lamp) |
| Total | $110-300 / year |
Maintenance cost depends on ink use, shift pattern and environment. More importantly, record nozzle condition and anomalies so small issues can be addressed before they become unplanned downtime.
Related Guides
- How to Choose a UV Printhead — Printhead lifespan depends on maintenance quality
- How to Choose UV Ink — Ink cleanliness directly affects clogging rate
Frequently Asked Questions
How much daily maintenance does a UV printer need?
About 5 minutes per day: before startup, check ink levels, waste-ink tank, UV lamp status and white-ink circulation; at startup, run head cleaning and a test print; before shutdown, confirm head parking, capping-station moisture, and turn off the UV lamp and air compressor. 5 minutes a day prevents the vast majority of breakdowns.
How do I unblock a clogged printhead in an emergency?
Light clogs respond to the built-in Auto Cleaning program. Moderate clogs need 10-30 minute soaking in cleaning fluid followed by a nozzle test. Severe clogs need an ultrasonic cleaner. Heads that still fail to recover must be replaced. Cleaning at every startup — not waiting for full clogs — is the key prevention.
How often should I check the white-ink circulation pump?
Listen to the pump's sound every day to confirm circulation; clean the circulation line outlet weekly; check the pump's running status and ink-tube seals monthly. A failed circulation pump lets white ink settle and clog the ink channels — repair costs far exceed routine inspection effort.
How often does the UV lamp need replacement?
UV LED lamps typically last over 20,000 hours — about 7 years at 8 hours per day. Check lamp output power monthly with a UV intensity meter; consider replacement when output drops below 80% of rated. Mercury lamps last far less (about 800-1,000 hours) and have largely been replaced by LEDs.
How do I store a UV printer that won't be used for a while?
For idle periods over 3 days, replace ink with dedicated cleaning fluid to protect the printhead. Over a week, also clean the capping sponge, disconnect power, and cover with a dust cover. Keep ambient temperature at 15-28°C and humidity at 40-60%. Before restarting, gradually prime ink and run printhead tests.
5-step standardized UV printer maintenance routine
- Build a daily / weekly / monthly maintenance schedule and post it next to the machine
- Complete the 5-minute startup and shutdown checks every day
- Clean the ink path, capping station and circulation system every week
- Inspect motion components, UV lamp and environment every month
- Log every maintenance action and anomaly to build a machine health record